
Pear Mousse with Blackberry Cream Jelly (Foodista #105)
Experience the delightful tastes of a winter wonderland with this irresistible pear mousse with blackberry cream jelly. This sophisticated sweet treat is bound to leave a lasting impression to everyone at your diner table!
Equipment


Ingredients
STEP 1 - BLACKBERRY CREAM JELLY (DAY PRIOR)
- 2 sheets (4 g) gelatin (Substitute 1:1 Agar Agar)
- 16.23 oz (460 g) blackberry (Total liquid 282 g)
- 1.76 oz (50 g) sugar
- 2.65 oz (75 g) heavy cream
STEP 2 - PEAR MOUSSE
- 3 sheets (6 g) gelatin (Substitute 1:1 Agar Agar)
- 8.81 oz (250 g) pears (About 2 Pears weighting 12.35 oz | 350 g)
- 1.76 oz (50 g) sugar
- 1/4 tsp (1.23 g) ground vanilla bean
- 7.06 oz (200 g) heavy cream (Very Cold)
Instructions
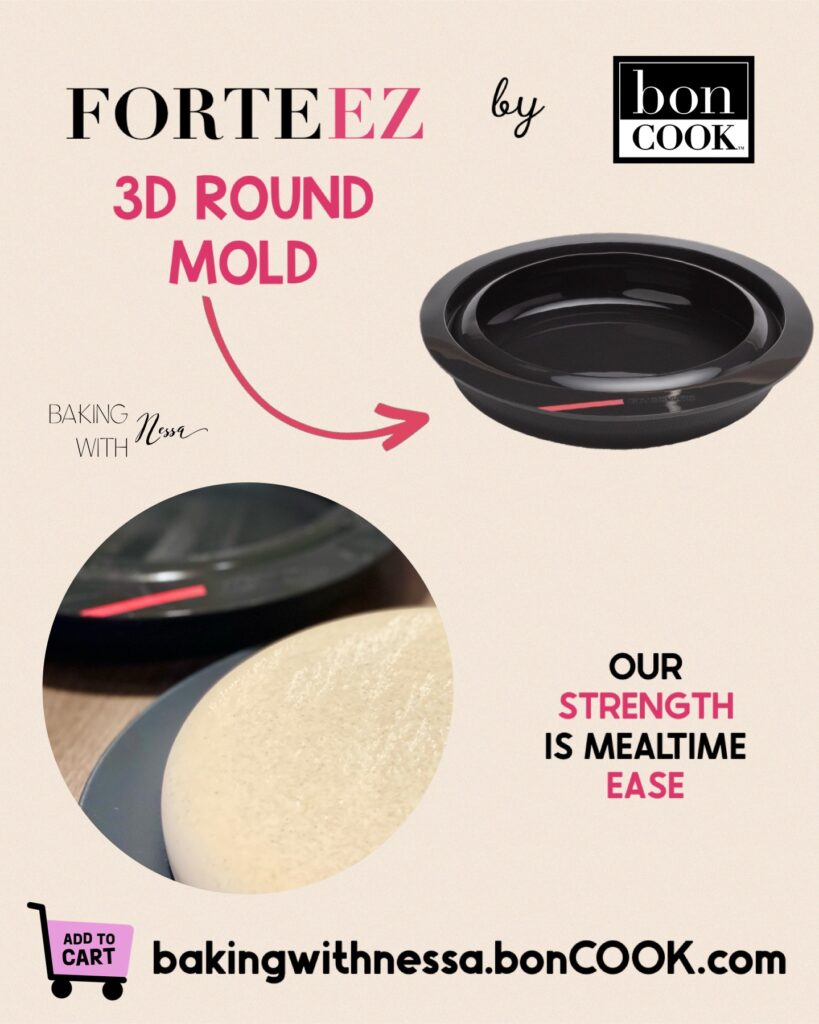
- Place both Flower Tray and the Small Round Mold on top of your Medium Perforated Baking Sheet. Set aside.
STEP 1 - BLACKBERRY CREAM JELLY PREPARATION (DAY PRIOR)
- Place the gelatin in a small bowl full of cold water. Let it set for 10 minutes.2 sheets gelatin
- Add your washed blackberry to your blender. Mix under "Purée Mode" or until desired consistency. Then, pass it through the sift in order to remove all the skin and seeds.16.23 oz blackberry

- In a medium sauce pan, heat on medium low your blackberry purée together with the sugar and heavy cream. Continue to whisk until it starts boiling. Once it starts boiling, remove from heat and drop the scooped gelatin in. Stir until desolved.2.65 oz heavy cream, 1.76 oz sugar

- Pour right away about 2 scoops of your blackberry cream into one well of the Flower Tray.

- Then, pour the remaining blackberry cream into the Small Round Mold. Let it completely cool down before placing in the freezer overnight or until the jelly is set.

- Once your blackberry cream jelly is set, peel it from both molds, wrap them separately in plastic film and return to the freezer while preparing the rest of the recipe.
STEP 2 - PEAR MOUSSE PREPARATION
- Place the gelatin in a small bowl full of cold water. Let it set for 10 minutes.3 sheets gelatin
- Add your pealed and seeded pears to your blender. Mix under "Purée Mode" or until desired consistency. Then, pass it through the sift in order to remove most of the grainy pieces.8.81 oz pears

- In a medium sauce pan, heat on medium low your pear purée together with the sugar and ground vanilla bean. Continue to whisk until it starts boiling. Once it starts boiling, remove from heat and drop the scooped gelatin in. Stir until desolved. Set aside to cool down.1.76 oz sugar, 1/4 tsp ground vanilla bean

- In a mixing bowl, beat the heavy cream until stiff peaks. Then, fold it into your pear preparation. Pour it directly into your 3D Round Mold on top of your Medium Perforated Baking Sheet.7.06 oz heavy cream

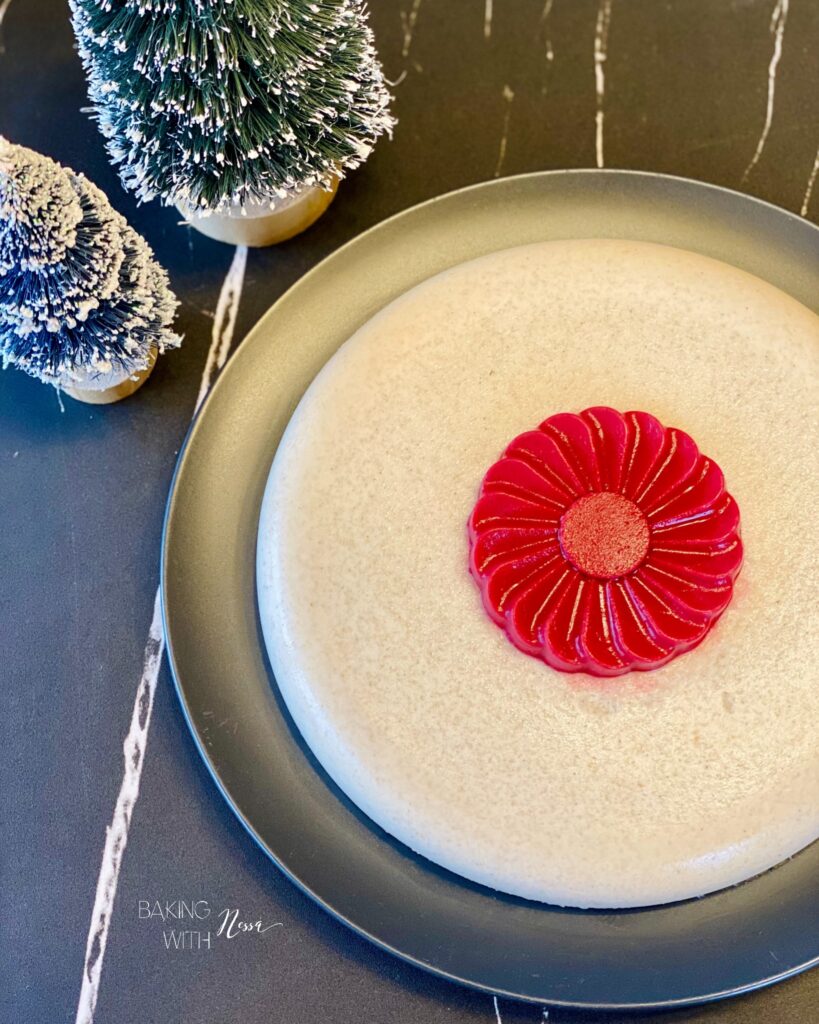
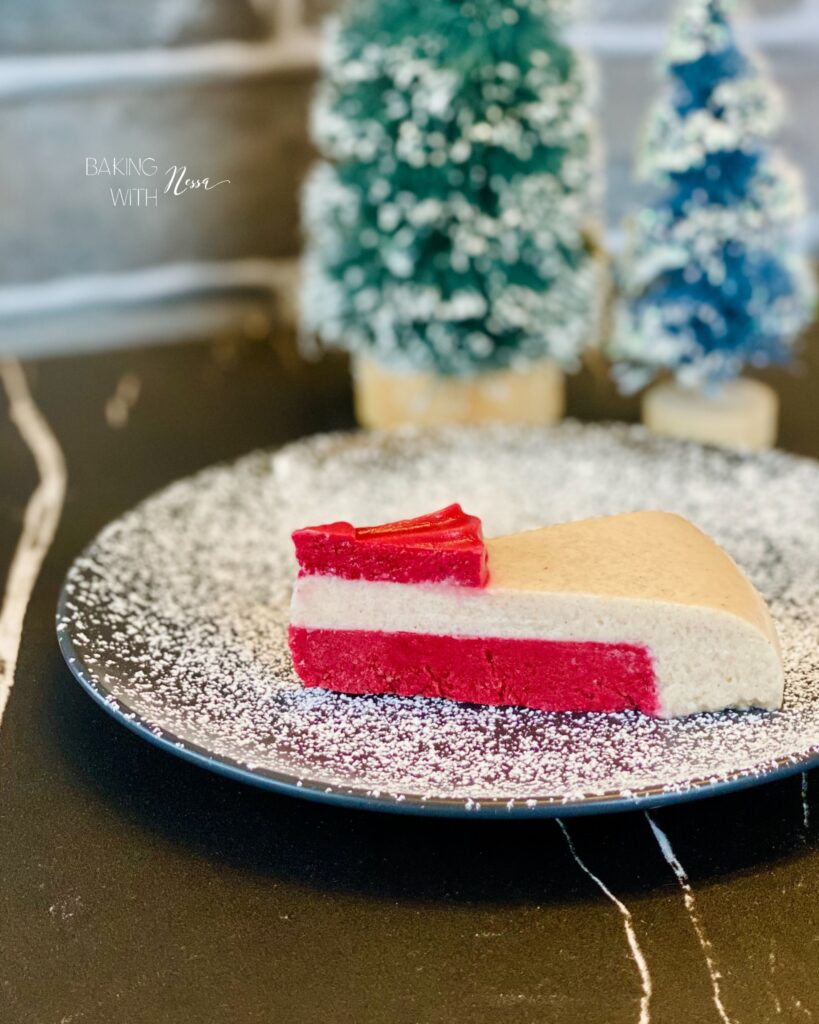
- Place the blackberry cream insert on top pressing gently. Level with your offset spatula and cover tightly with a plastic wrap. Freeze overnight (12 hours).
WHEN READY TO ENJOY!
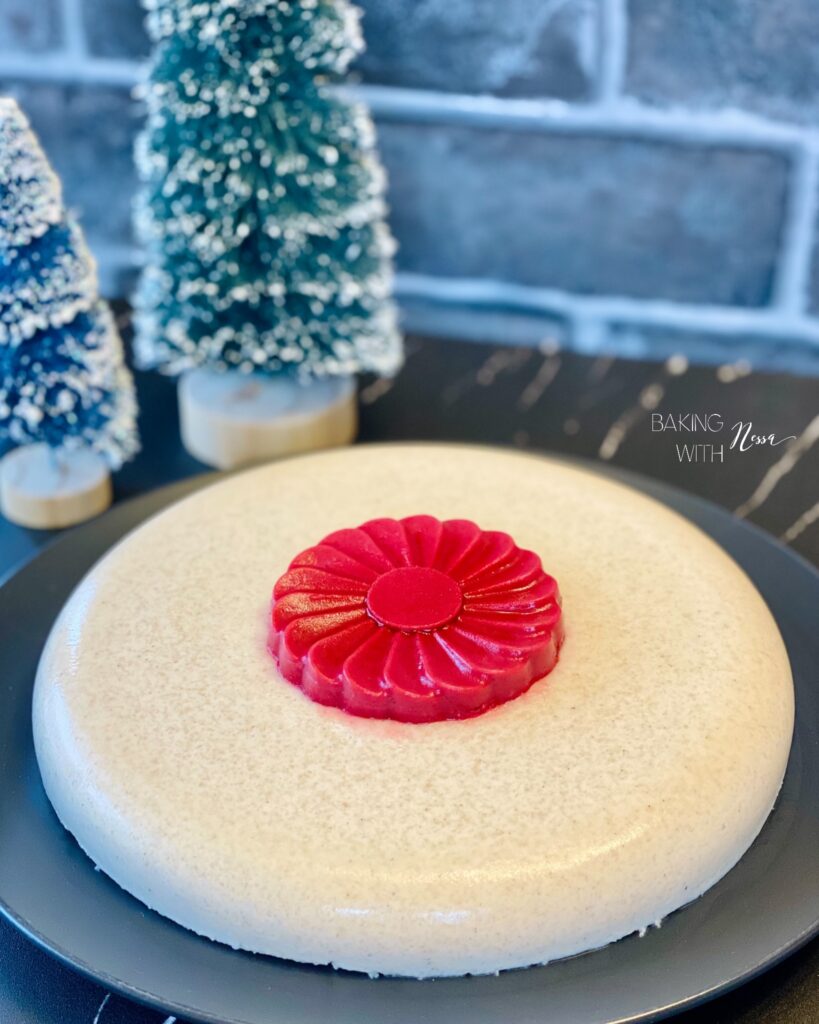
- When ready, take your Pear Mousse with Blackberry Cream Jelly out of the freezer. Gently peel it from your 3D Round Mold onto your service platter and place the blackberry flower on top in the center. Refrigerate to defrost 3 to 4 hours prior eating. To decorate I used a ribbon of melted chocolate and Festive Sprinkles. Bon Appétit & Happy Holidays!

YouTube Video
Photos


Nutrition
Calories: 212kcal | Carbohydrates: 24g | Protein: 3g | Fat: 13g | Saturated Fat: 8g | Polyunsaturated Fat: 1g | Monounsaturated Fat: 3g | Cholesterol: 39mg | Sodium: 13mg | Potassium: 163mg | Fiber: 4g | Sugar: 19g | Vitamin A: 637IU | Vitamin C: 14mg | Calcium: 43mg | Iron: 0.5mg
Have You Made This Recipe?Be sure to send me your photos I would love to share them on the blog: bakingwithnessa@hotmail.com