
Coconut Skyr Pie with Graham Crackers (One Ingredient #100)
Indulge in a tropical paradise with every bite of this dreamy coconut skyr pie! Made with a buttery graham cracker crust, it's the perfect dessert to transport your taste buds to paradise. Get ready to fall in love with this creamy, coconutty goodness!
Equipment


Ingredients
PIE CRUST
- 4 Tbsp (55 g) butter (Melted)
- 18 squares (20 g) Graham crackers (Crushed into Crumbs)
- 3 Tbsp (35 g) light brown sugar
- 1 tsp (5 g) coconut extract
COCONUT SKYR PIE FILLING
- 1 egg yolk (At Room Temperature)
- 1/4 cup (70 g) sugar
- 1 tsp (2.5 g) vanilla bean paste
- 1 tsp (2.5 g) coconut extract
- 2 Tbsp (15 g) cornstarch
- 1/4 cup (50 g) sugar
- 1 cup (225 g) coconut milk (Unsweetened)
- 1/2 cup (120 g) heavy whipping cream
- 1/4 cup (75 g) condensed milk
- 1/2 tsp (3 g) sea salt
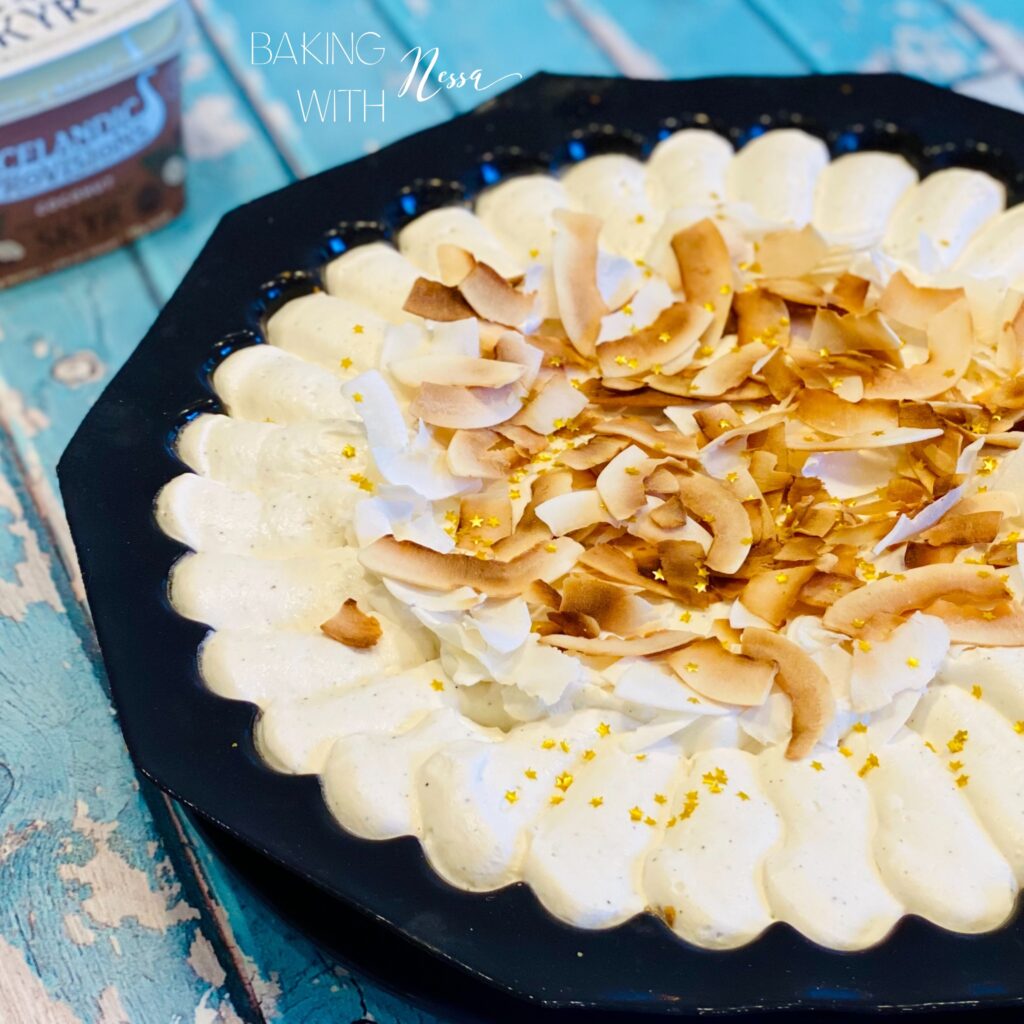
- 5 1/3 oz (150 g) Skyr Yogurt (1 Pot | Coconut | Icelandic Provisions)
CREAM TOPPING + DECORATIONS
- 1 cup (240 g) heavy whipping cream
- 1 tsp (2.5 g) coconut extract
- 1/4 cup (20 g) unsweetened coconut flakes (Toasted)
Instructions
- Place your Pie Flexipan® Mold on the top of your Medium Perforated Baking Sheet. Set aside.
- Preheat oven to 350F/180C.
PIE CRUST PREPARATION
- Place butter in a small sauce pan and heat on low until melted. Set aside.
- In a mixing bowl, combine the crushed Graham cracker, light brown sugar with the cooled melted butter and coconut extract.

BAKE!
- Bake for 5 minutes at 350F/180C. Remove from the oven, and set aside to cool.

COCONUT SKYR PIE FILLING PREPARATION
- In a mixing bowl, beat the egg yolks together with the sugar, vanilla bean paste and coconut extract until light and fluffy (about 2 minutes). Add the cornstarch. Mix until just blended. Set aside.

- In the medium sauce pan, heat on medium low the sugar with the coconut milk, heavy whipping cream, condensed milk and sea salt. Continue to whisk until it starts boiling.

- Once it starts boiling, remove from heat and slowly stream in 3-4 times into your egg yolk preparation. Whisk continuously.

- Pour the entire mixture back into the sauce pan. Return it to the stove. Continue to whisk until it starts boiling. NOTE: The cornstarch will thicken and a custard will form. Once thick, remove from the heat.

- Transfer your custard into a clean bowl and whisk in the coconut skyr. Set aside to cool down.

CREAM TOPPING PREPARATION
- In a mixing bowl, beat the heavy whipping cream together with the coconut extract until stiff peaks. Fill your Pastry Bag with the cream. Set aside.

ASSEMBLY
- NOTE: Now you can either demold your pie crust and set it on your service platter or simply keep it in the mold before starting to assemble your pie.
- Carefully spread the cooled coconut custard on top of the crust.

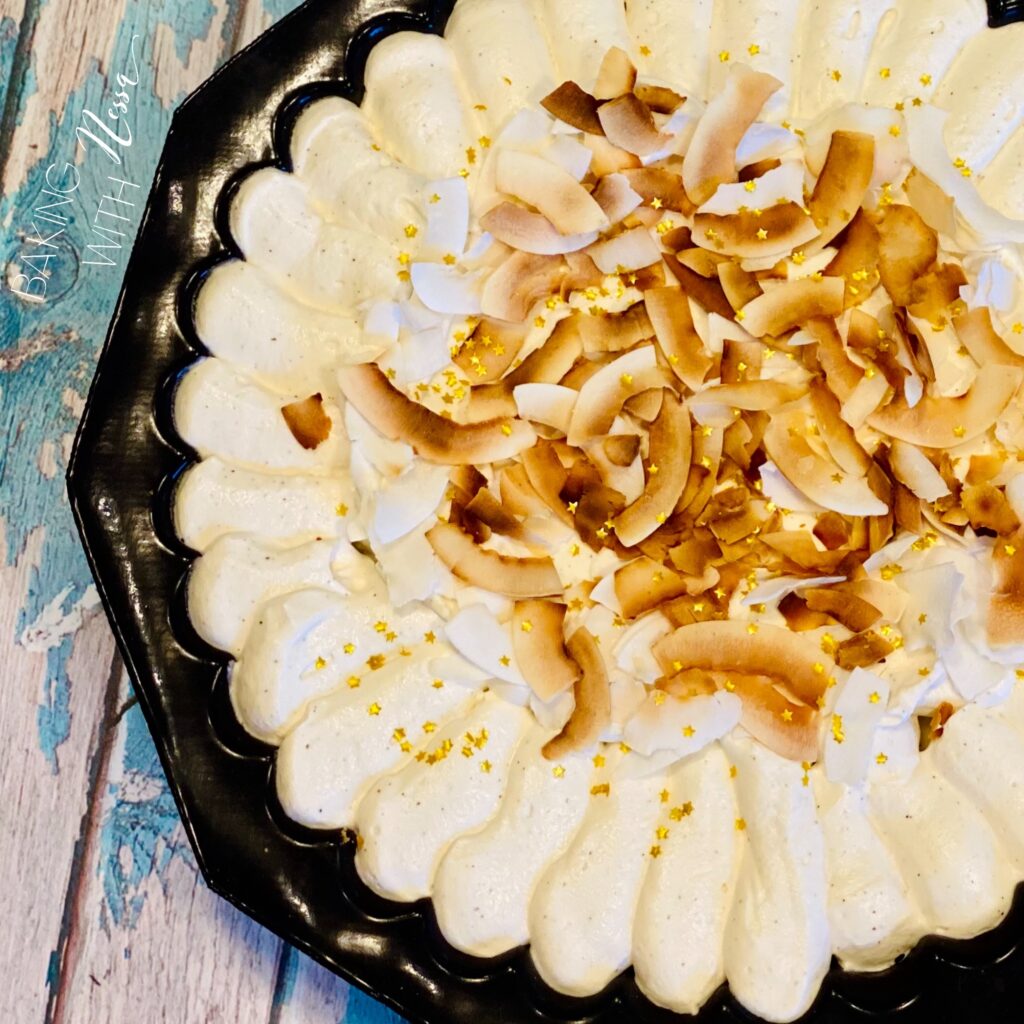
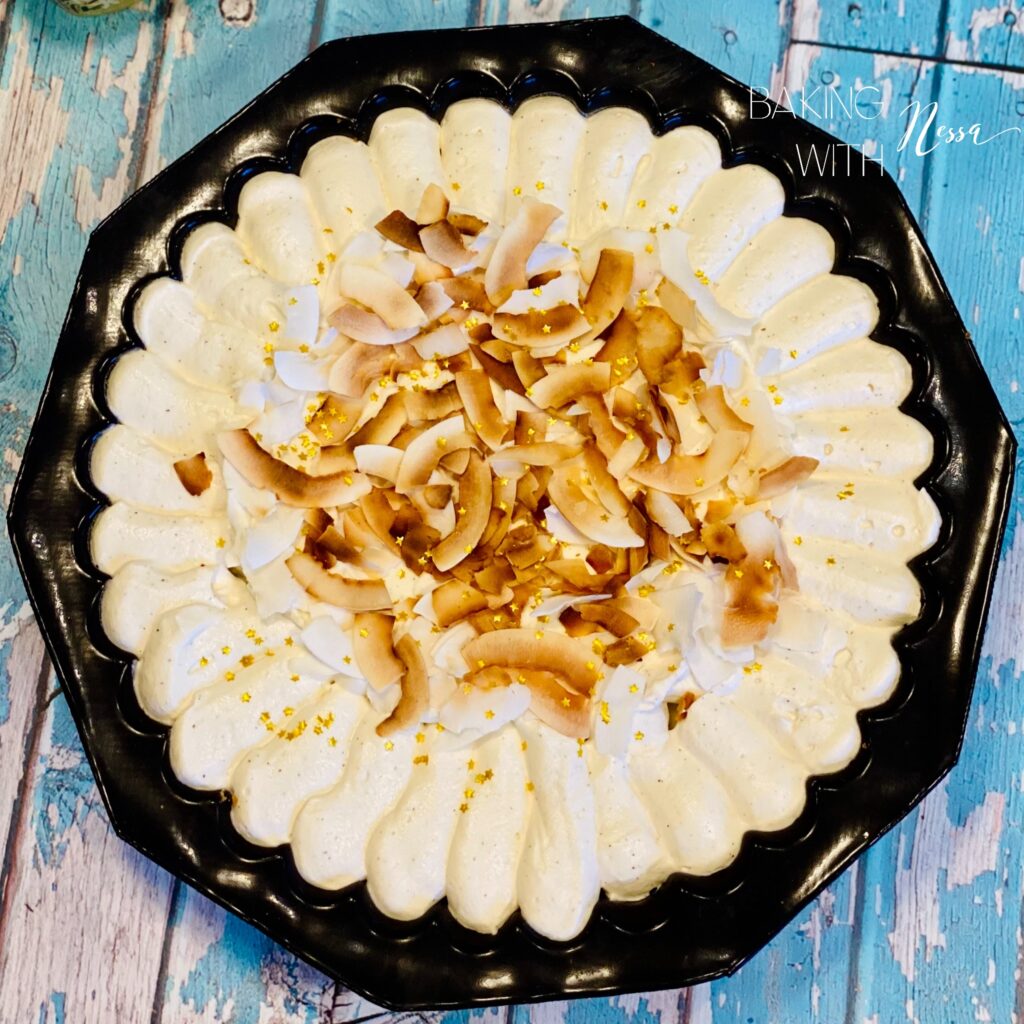
- Then, pipe the heavy cream around and sprinkle the toasted coconut flakes on top.

- Once your Coconut Skyr Pie is assembled. Refrigerate for at least 3 good hours or best overnight before demolding. Enjoy & Bon Appétit!
YouTube Video
Photos


Nutrition
Calories: 407kcal | Carbohydrates: 29g | Protein: 4g | Fat: 31g | Saturated Fat: 22g | Polyunsaturated Fat: 1g | Monounsaturated Fat: 6g | Trans Fat: 0.2g | Cholesterol: 93mg | Sodium: 239mg | Potassium: 180mg | Fiber: 1g | Sugar: 25g | Vitamin A: 889IU | Vitamin C: 1mg | Calcium: 80mg | Iron: 1mg
Have You Made This Recipe?Be sure to send me your photos I would love to share them on the blog: bakingwithnessa@hotmail.com